hololive Dreams
Eight minigames: controls & rewards
Find controls, practical decisions and rewards for all eight minigames. Use the material table to choose a game, or jump to the game you are learning.
Choose a game or material
| Game | Unlock | Main rewards |
|---|---|---|
| Hoppin’ Rope | Chapter 1, Episode 3 | Wood, nails, stone |
| Matching cooking game | Chapter 1, Episode 11 | Wood, paint, glass |
| Mega Circuit | Chapter 2, Episode 2 | Megasphere Coins |
| Pokajan! | Chapter 2, Episode 8 | Megasphere Coins |
| Card of Greed / High & Low | Chapter 2, Episode 9 | Megasphere Coins |
| Shadowbound Chase | The Shadowbound Chase area quest | Harmony Garden Coins |
| Splash Ball | Chapter 3, Episode 8 | Soda Pop Coins |
| Fishing | Chapter 3, Episode 3 | Fish, drift metal; coins from selling fish |
Rope supplies nails and stone; cooking supplies paint and glass. Circuit, Pokajan and High & Low provide coins to spend at the exchange.
Hoppin’ Rope: control your airtime
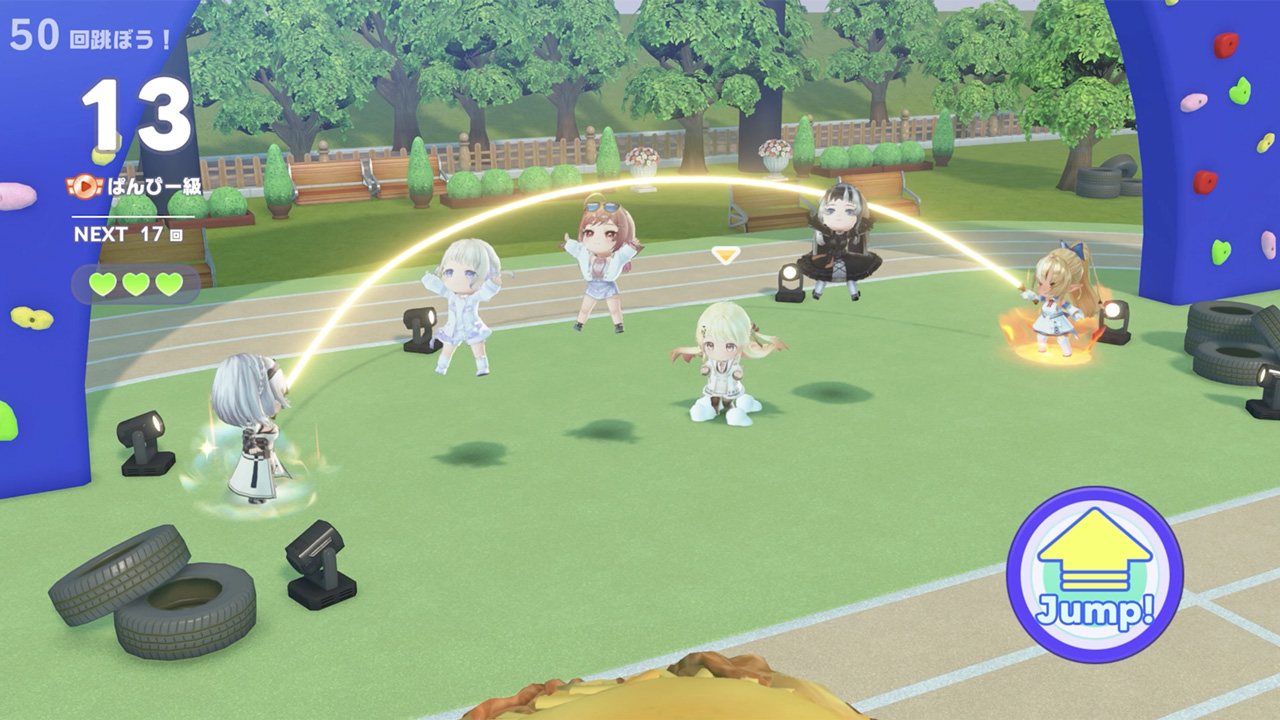
Five players jump a shared rope. A short press and a held jump give different airtime. Solo ends after three knockbacks. In multiplayer you can return while someone remains; a full-team knockout ends the run.
Re-read the rhythm when the turner changes
| Turner | Change | Focus |
|---|---|---|
| Pekora | Speeds up | Shorten airtime to land before the next pass. |
| Marine | Slows down | Wait for the rope instead of keeping the old tempo. |
| Flare | Back-and-forth swing | Keep watching after a pass for the return. |
| Noel | Bowls and steam obstruct the view | Use visible rope movement and sound; avoid panic tapping. |
- Start lowFind a consistent short press at normal speed.
- Speed changesChange airtime so the next landing is ready.
- Identify the failureSeparate jumping too early from landing too late.
Farm consistently
When farming wood, nails or stone, first reduce repeated failures at transitions. Drops vary by result, so there is no fixed nails-per-run amount here. Check your facility’s missing materials before farming.
Cooking: watch the order and free slots
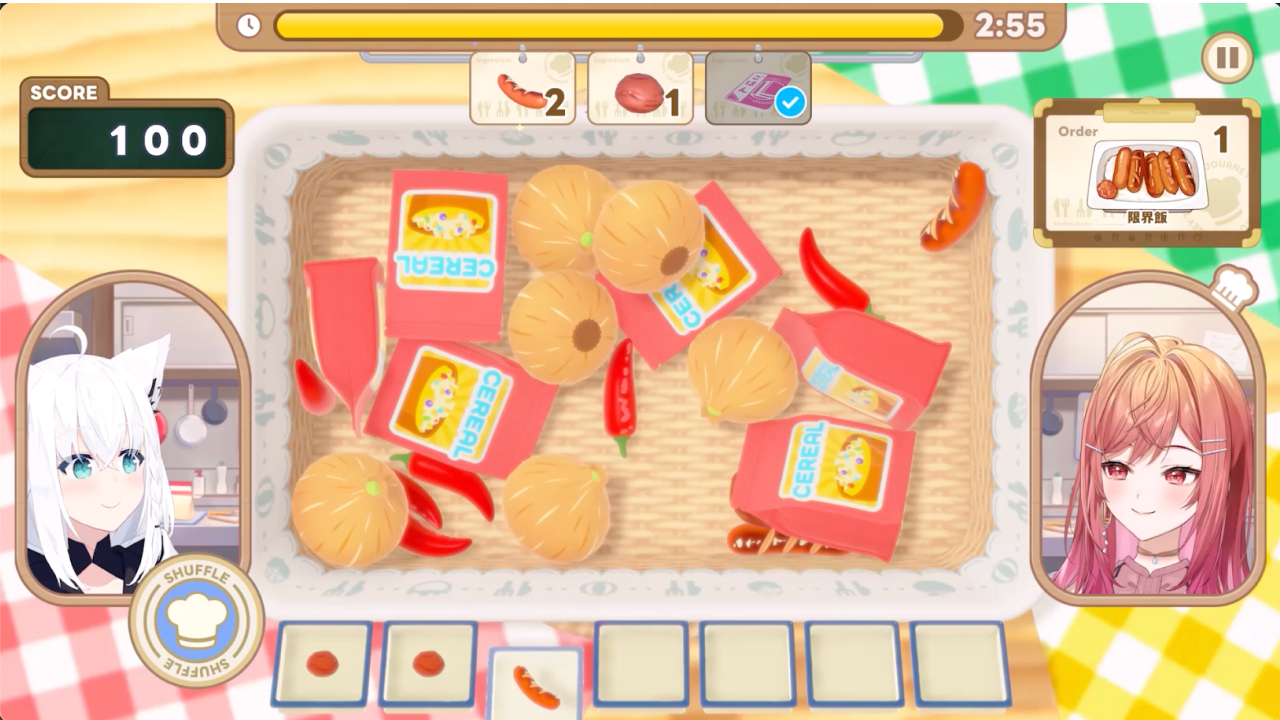
Pick ingredients from the basket to complete orders. Three matching ingredients clear from the tray, including ingredients not needed by the order. EASY targets four dishes and NORMAL six; Score Attack lasts three minutes. Consistent clearing matters as much as spotting ingredients quickly.
Complete a set already in your tray
- Check free slotsWhen space is tight, do not chase only the order.
- Look for a pairIf its third is accessible, complete it first.
- Return to the orderUse shuffle for buried ingredients rather than filling slots with unrelated ones.
Avoid a crowded tray
- Taking one of many ingredients fills the tray without clearing. Before starting a set, locate the next two.
- Do not remove every foreground ingredient just to reach an order item. Pick an order that also completes sets in the tray.
- For wood, paint and glass, prioritize completed dishes without bursting. Learn tray management before pushing Score Attack.
Mega Circuit: cut falls before corners
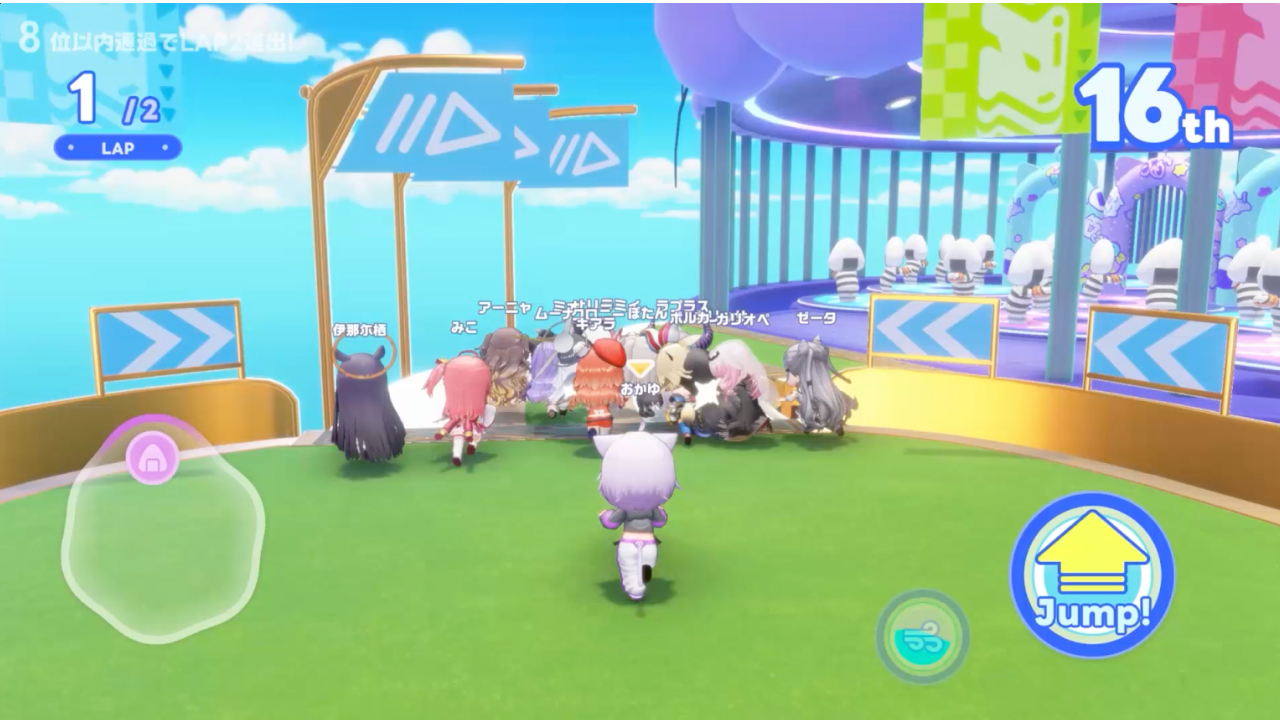
A two-lap obstacle race for up to 16 players. Until you know the course, prefer a reliable route to a short one. Extra jumps are not automatically faster: jumping without a landing plan can cost recovery time.
- Read the entryWatch the obstacle and locate the next safe surface.
- Choose a lineMove with the opening; avoid a sharp turn at the edge.
- Secure the landingConfirm your landing before the next jump.
Troubleshoot obstacles
- Pendulums: look for a window along an edge instead of charging through the middle. Use the wait to locate the next platform.
- Rotating platforms and gaps: the destination moves. Shift your gaze to the landing point; dash only after lining up.
- Conveyors and arms: correct for the push. Reposition toward a safe part of the course before another dash.
- Even behind, use lap two to practice. Increase your coin stake only after repeated obstacles are reliable.
Pokajan!: balance points, completion and the score gap
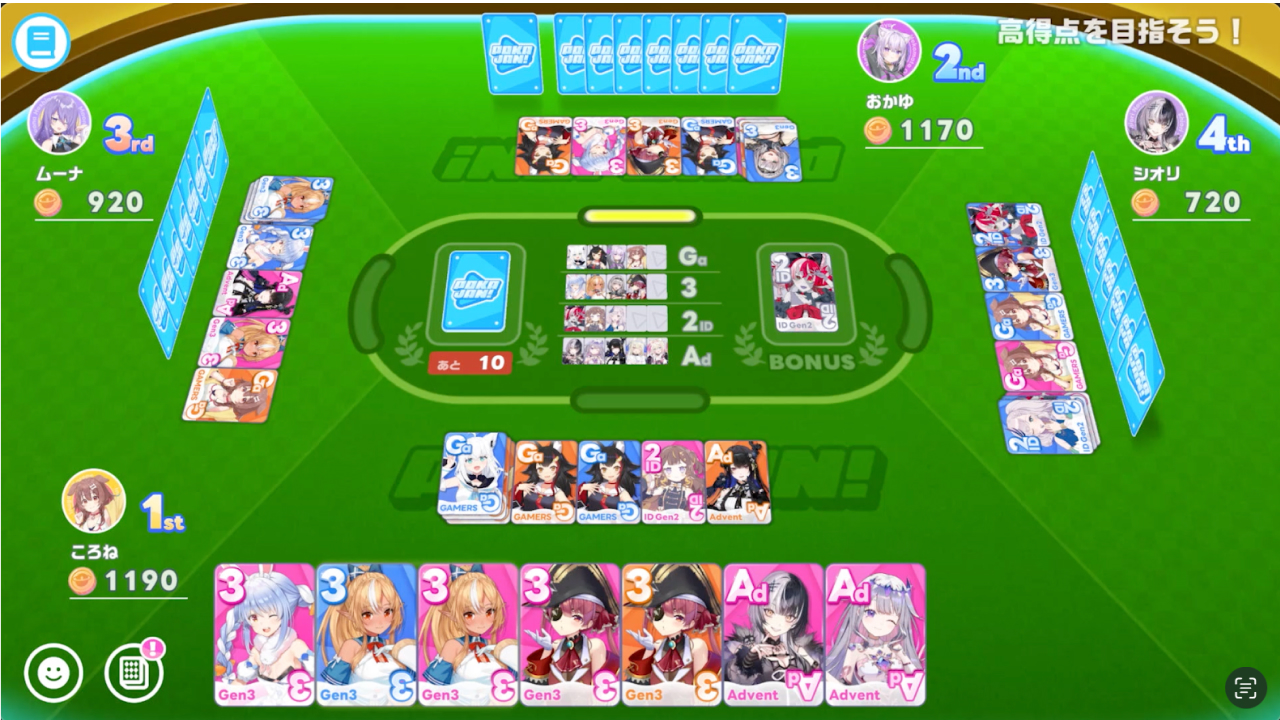
Four players build hands from member cards, scoring matching cards or eligible units. Start with the units and bonus displayed in the middle; do not assume every possible group forms a hand in the current match.
Compare hand values
| Hand | Mixed colors | Same color |
|---|---|---|
| Three of a kind | 120 | 840 |
| 3-member unit | 180 | 480 |
| 4-member unit | 300 | 840 |
| 5-member unit | 480 | 1,800 |
Each bonus card adds 90 points. A normal three of a kind with three bonus cards scores 120 + 90 × 3 = 390. Compare both value and how many cards are still needed.
- Keep close handsPrefer a reachable hand over committing only to a distant large one.
- Read score and deckWith few draws left, reconsider an incomplete large hand.
- Score or defendChoose between finishing a hand and avoiding a dangerous discard.
Look beyond your hand
- Check whether many copies of the cards you need are already discarded. A valuable hand still needs reachable cards.
- The same discard has different value when protecting a lead or chasing one. Read the deck count alongside the score gap.
- A discard that was safe earlier is not permanently safe. Reassess after other hands change.
High & Low: decide when to bank
First make two pairs or better in poker, then use the payout for High & Low. Choose whether the next card is higher or lower. A win doubles the stake and the drawn card becomes the next reference; an equal rank is a PUSH.
Reassess after each draw
- Read the current rankLow ranks leave more higher possibilities, and vice versa.
- Consider depletionDrawn cards are not returned; rank alone does not give exact odds.
- Continue or bankWhen you have the coins you need, consider stopping.
Around 7, 8 and 9, the rank advantage is smaller. AIKE describes stopping around these ranks. That is a risk-control rule, not a guarantee of a streak or a fixed time to the daily cap.
Shadowbound Chase: divide objectives and coverage

Pranksters: deliver the keys
- Pick upCollect keys and choose a delivery target.
- Hold UseUse keys at a facility after checking its requirement.
- RescueCheck nearby danger, then hold Rescue beside a captured teammate.
Two players can clear a laser switch faster, reducing facility key requirements by one. Split delivery, switches and rescue instead of crowding one objective. When warnings or a heartbeat signal danger, check your escape route rather than entering a dead end.
Patrol: spread your coverage
Approach and press Catch. Speed, radar or stealth skills are assigned to patrol players and have a recharge. If everyone follows one target, other facilities are exposed. Split coverage around active objectives and likely rescue routes.
Unlock through the Shadowbound Chase area quest after progressing Harmony Garden. Afterwards, visit Zeta at the holoX base; spend the coins at Nepolabo Mart.
Splash Ball: defend valuable balls and line up shots

Three teams of three start at 30 points. Score into opponents’ goals and lose points when your own goal is breached. Play ends at three minutes, 60 points or zero for a team. Move, jump and boost to push balls with your boat.
Choose by ball value and your position
- A gold ball threatening home costs five points. Address it before chasing a distant one-point ball, and avoid pushing toward your own goal.
- Strike the ball centrally. If a sideways touch sends it off line, reposition before repeatedly bumping it.
- Boost needs time to recharge. Save it for a decisive ball or an urgent return rather than spending it without a target.
Clearing a ball from home can earn defense points, subject to a cooldown; a ball last touched by your team is excluded. Defense contributes to your individual score too.
Fishing: choose a target from the catalog
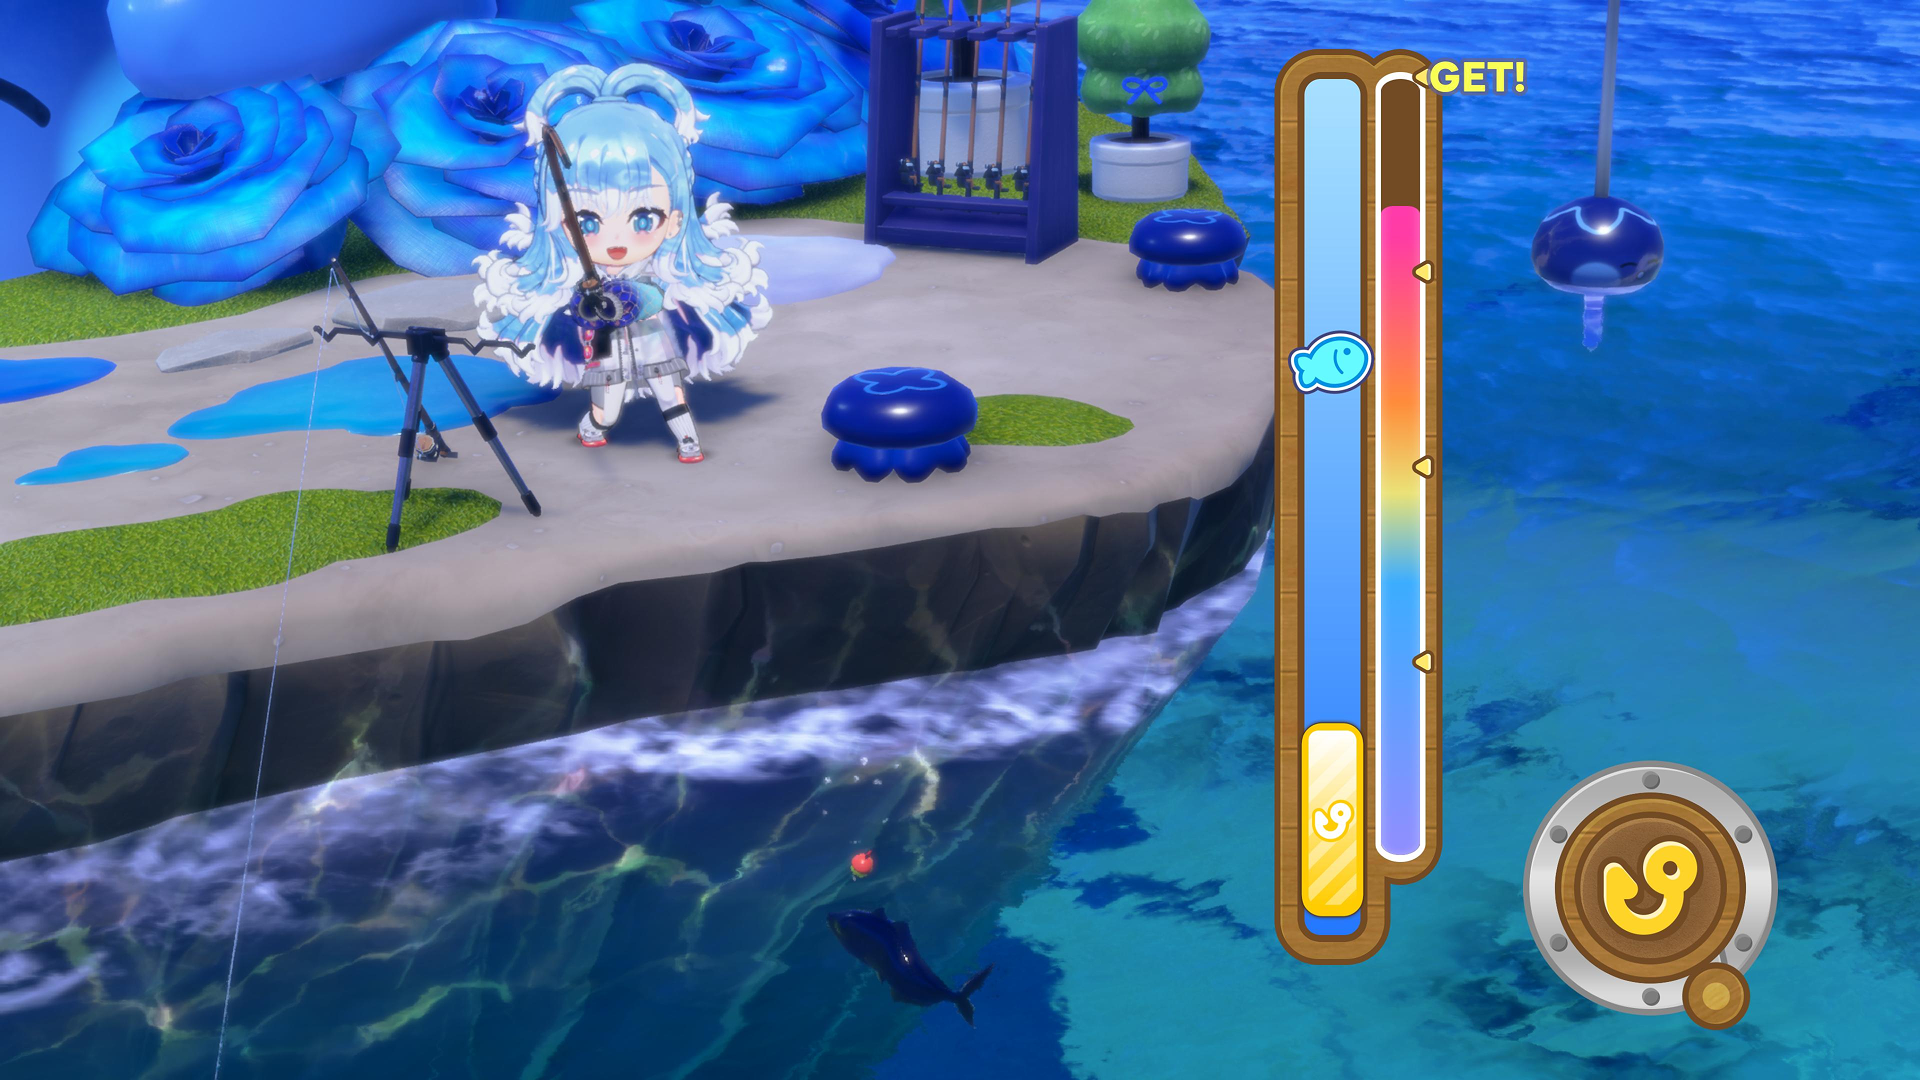
Unlocked in Chapter 3, Episode 3. Candidates depend on the spot, in-game time and bait. For collection, choose a missing catch and match its conditions before spending bait. Farming drift metal and completing the fish catalog call for different route choices.
- Filter the catalogCheck the fish, spot, bait and time.
- Match conditionsUse in-game day/night, not your real-world clock.
- Review the catchSwitch targets as gaps close; sell fish or gather materials.
When the same catch repeats
- First check the target’s location and bait. Expensive bait does not compensate for the wrong spot or time.
- Preferred bait does not guarantee that fish on every cast. Review conditions rather than treating a few misses as a measured drop rate.
- If you lose hooked fish, review the bar-control guide below and practice the input before spending costly bait.
Use your materials
References & image credits
Open reference list (14)
- Official source ↗Splash Ball: defend valuable balls and line up shots
- Official system guide ↗Fishing: choose a target from the catalog
- Holodori Lab: minigame records ↗
- AIKE: Chapter 2 play report ↗
- Cooking rules cross-check ↗
- Pokajan hands and scores ↗
- Chase controls and win conditions ↗
- AIKE: Chase play report ↗
- Official Chase introduction ↗
- Splash Ball in-game rules ↗
- High & Low rules cross-check ↗
- Minigame and fishing reports ↗
- Hololive fan wiki ↗
- New area announcement ↗
English explanations are editorial translations. © COVER / © QualiArts, Inc.